So I've recently been getting into cooking/baking! Next year, I won't have a meal plan so I plan on cooking at least a few days a week... So I decided it would be a good idea to make an apron! Practical and fun! :)
What you'll need:
-Newspaper (to help make the pattern)
-3 different pieces of fabric (different colors/patterns that go together)
~Main piece: 46in x 25 in
~Ruffle and Waist Tie: 18 in x 44 in
~Pocket and Neck Straps: 29 in x 15 in
To make the pattern, tape pieces of newspaper together to make one big piece.
For the pattern, I altered my measurements a little since I'm taller. If you click
here, you'll be able to see a picture of the pattern... I didn't get to take one of the pattern I used. Here are the measurements though:
Longest side: 24 in
Top: 5.5 in
From one side to another: 11 in
Short side: 9in
Your pattern will look like half of the picture below.
Once your pattern is cut out, you will fold the main fabric in half, putting the crease on the longest side of the pattern. Make sure you cut 2 different pieces using this pattern, one for the front and one for the back. They should both look like the picture above (which is upside down, sorry!) when they're done!
Next you can start cutting out all of the other pieces for the apron!
~pocket: 14 in high x 10 in long
~neck strap: 5 in wide x 29 in long
~waist ties: 5 in x 23 in (x2)
~Ruffle for pocket: 5 in x 20 in
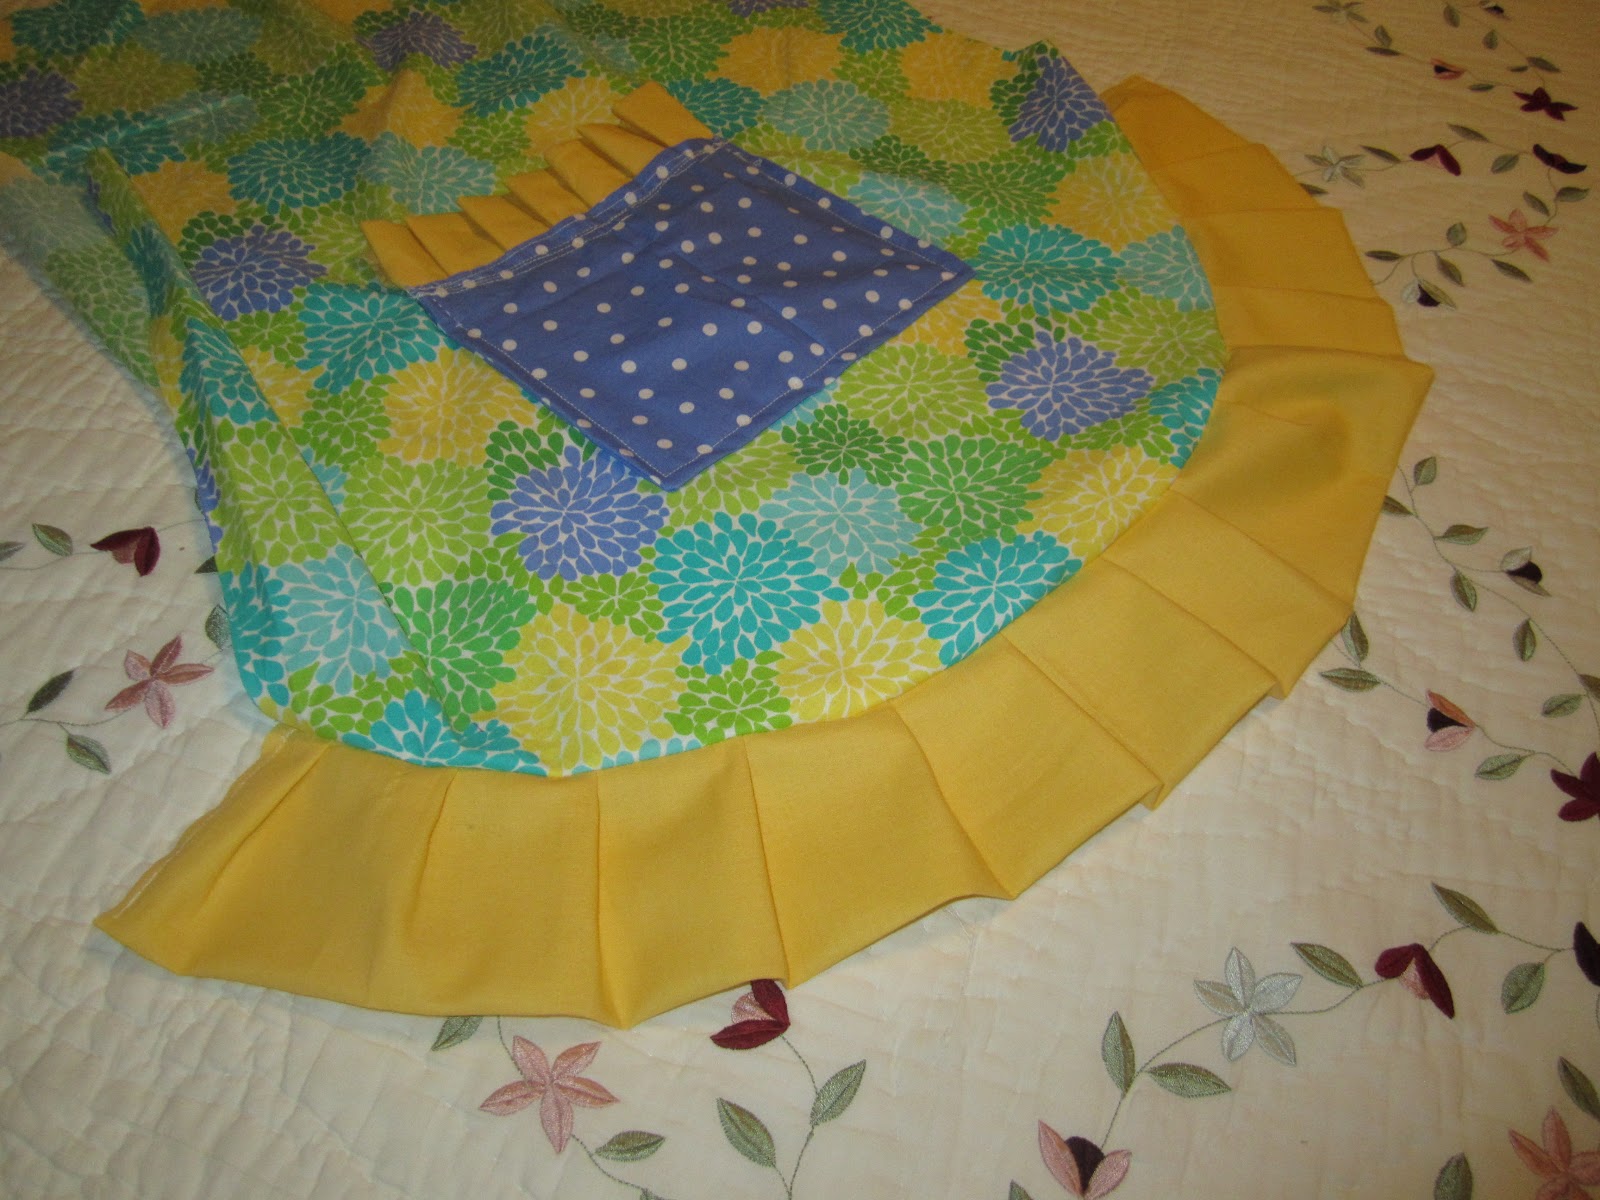
~Ruffle for bottom: 44 in x 8 in
Next, you'll make the pocket.
Fold the pocket in half to be 7 inches in height and 10 inches long. Turn it inside out(pictured below) and sew along the sides.
For the ruffles, fold the fabric in half and sew both short ends closed (below).
Start bending the fabric back and forth and pin to keep it folded.
Sew the top of the ruffle where the pins are, which will close the opening.
The next step is to attach the ruffles to the top of the pocket by sliding the sewn part of the ruffles into the pocket piece and sew these 2 pieces together, leaving ruffles poking out of the pocket.
Next, attach the pocket to the front of the apron by placing the pocket on the center of the front main piece. Sew around the sides and bottom, leaving the top open.
Next, make the ruffles for the bottom the same way you did for the pocket. When finished, attach it to the bottom of the front main piece.
To make the neck strap and waist ties, you need to flip the fabric inside out and fold it in half. Sew the open sides and only one short side closed. Leave an opening on one of the short sides.
Turn the fabric right side out using the short side opening. Iron the straps really good, then sew all sides on the strap right side out.
Attach the straps to the apron, attaching both sides of the neck strap and only one side of the waist straps to each side.
Once they're sewed on, fold everything onto the apron and pin them in place.
Lay the back piece of the apron, right side down, onto the front piece. Sew it around the edges, leaving four inches on one side open to put apron right side out.
Lastly, turn the apron right side out and sew 1/4 inch around the entire apron and here is your finished product!
You can find the original tutorial
here!